Part 3 – Create a package with the Customization Wizard
Step 1
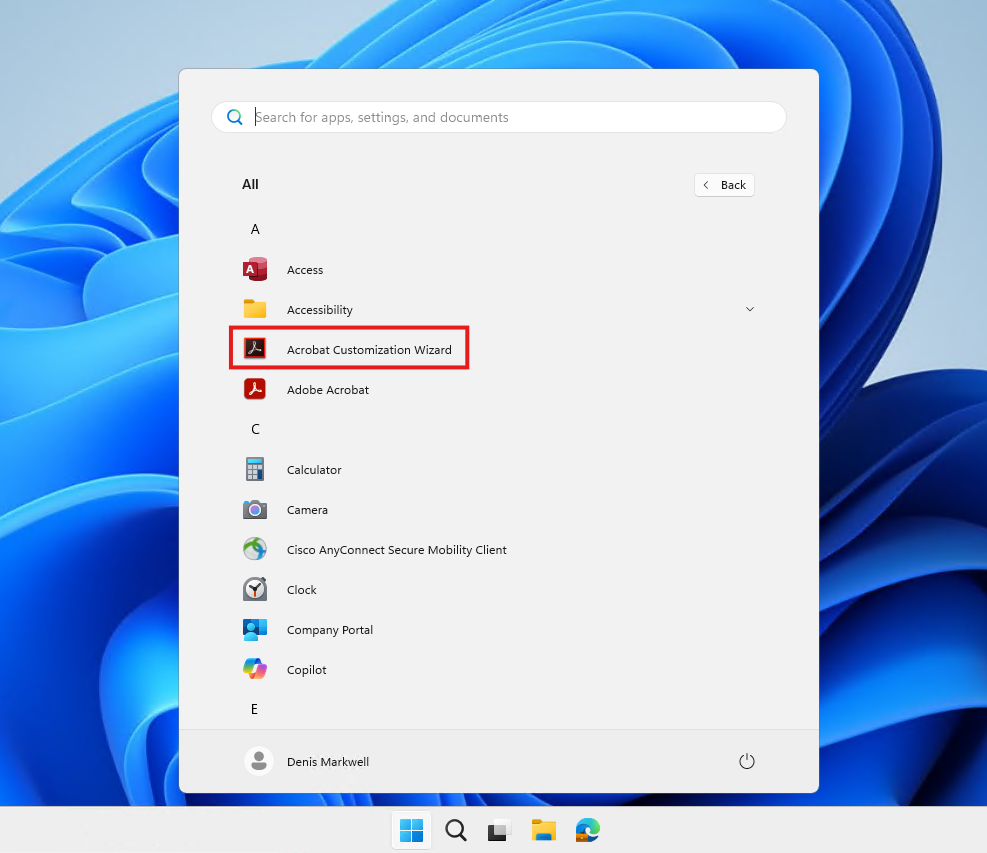
You will find the Acrobat Customisation Wizard in the Start Menu (under All)
Refer to Part 1 of this guide for info about how to download and install the customisation wizard.
Step 2
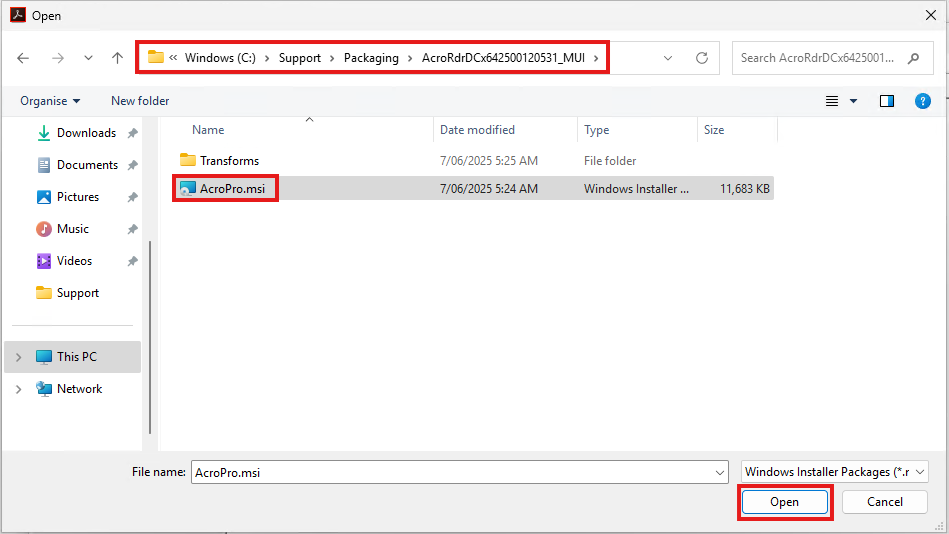
Now that the Customisation Wizard is open, from the File Menu, select Open Package

Step 3
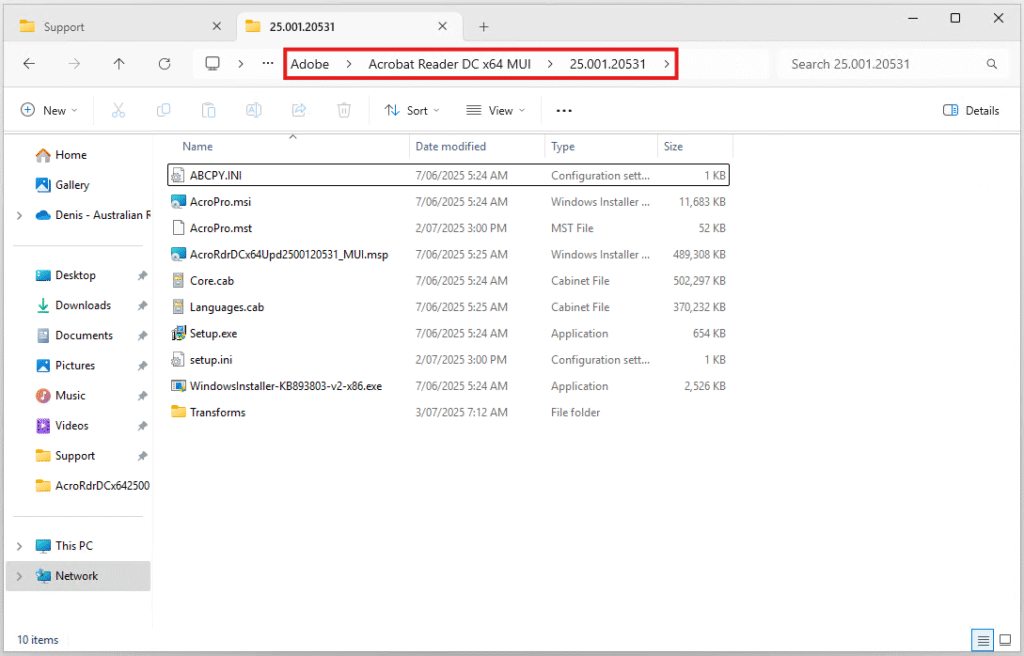
Navigate to the folder that contains the extracted Acrobat Installer files, obtained in Part 2 of this guide.
Select the AcroPro.msi file then click Open
(We are packaging the Reader however all releases are based on the Pro version and features are just turned off or on if a licensed user signs in to Acrobat)
Step 4
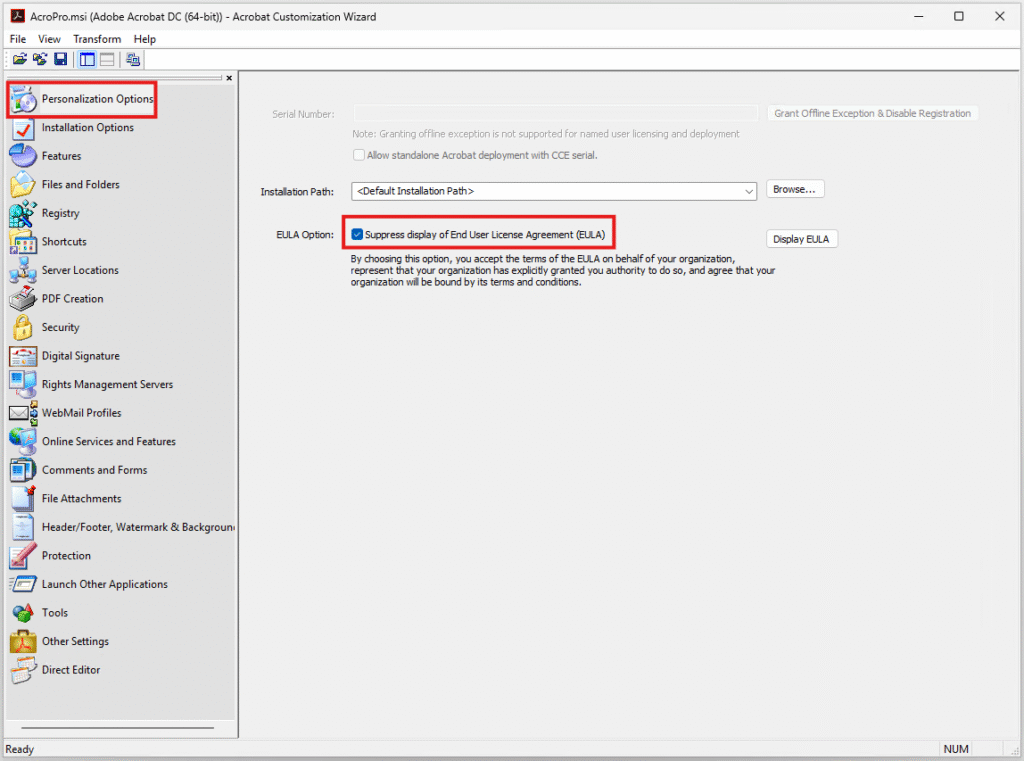
After opening the installer MSI, a series of configuration tabs will be listed down the left. We will now work through the tabs that we need to customise.
There are alot of pages we won’t change however finance or legal enterprises may have additional required around certificates or signing.
On the Personalization Options page, place a check in Suppress display of End User License Agreement (EULA).
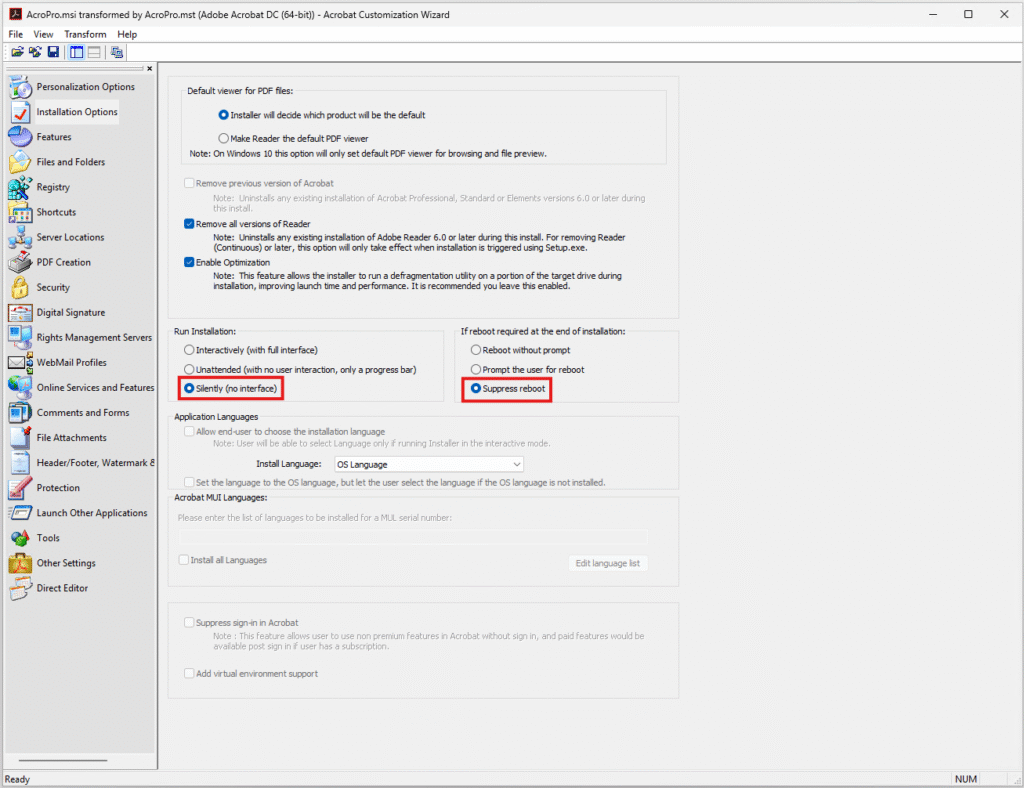
Step 5
On the Installation Options page, change the Run Installation option to Silent (No User Interface), and change the If reboot required at the end of installation option to Supress reboot.
Also confirm the Install Language is OS Language and other options match the screenshot to the right
Step 6
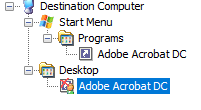
Jumping down to Shortcuts, under Desktop, right click on Adobe Acrobat DC and select Remove.
This will not place a shortcut on the desktop.
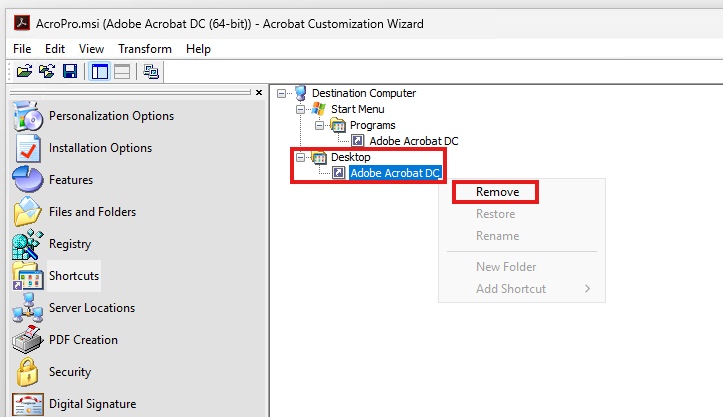
The icon will also change to sort of show a red cross, indicating its deleted.
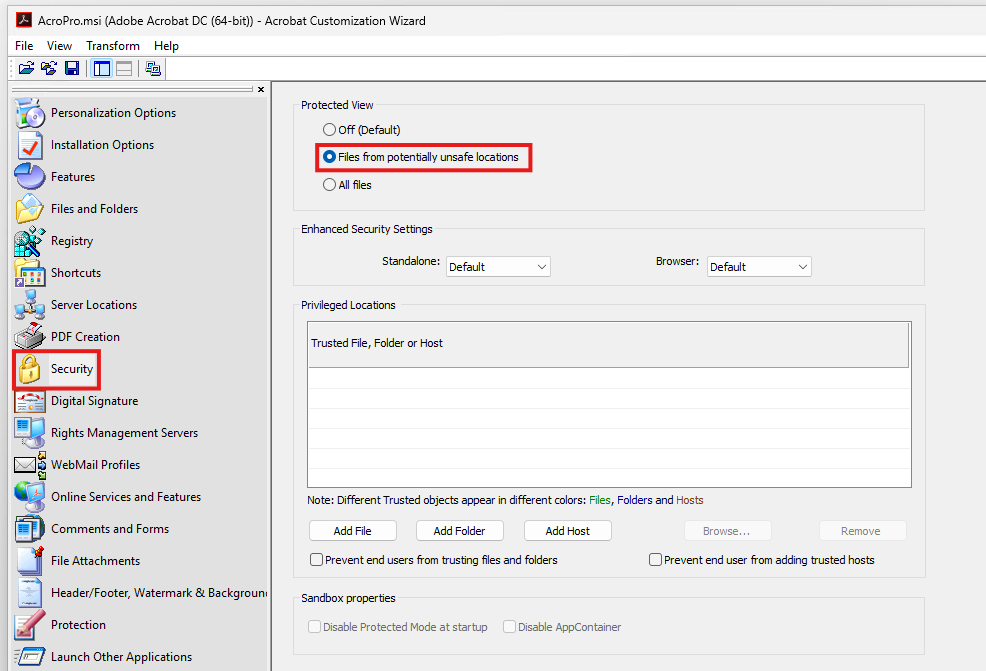
Step 7
On the Security page, change the Protected View option to Files from potentially unsafe locations.
(In an ideal world you would use protected mode for all files, but there can be compatibility issues with legacy apps so this needs to be tested before changing.)
Step 8
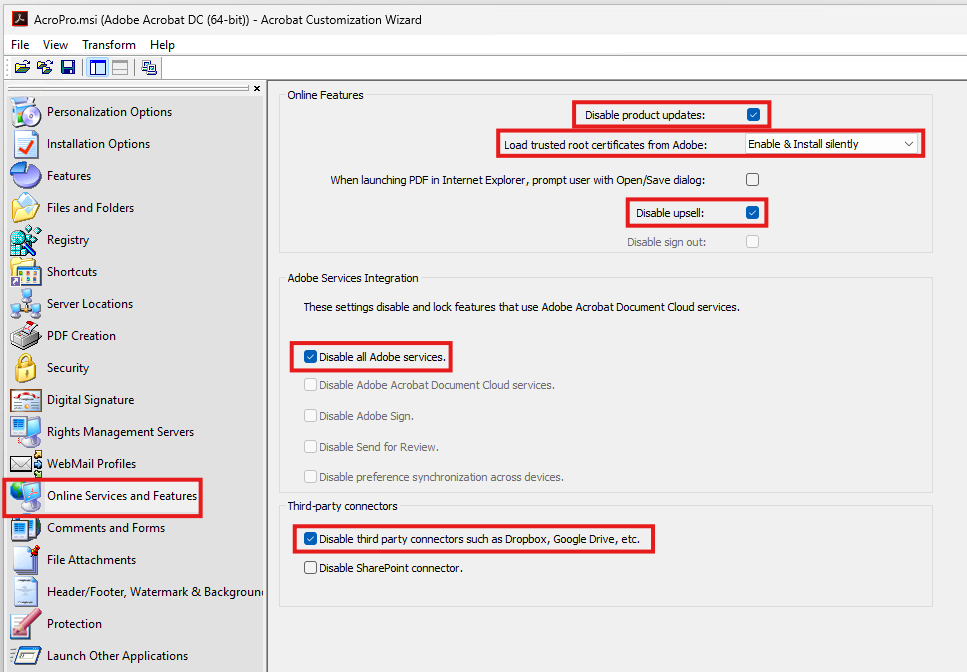
We have finally made it to the real reason we are here using the Acrobat Customisation Wizard, the Online Services and Features page.
Place a check in Disable product updates. (This is more a historical setting from when you needed local admin permissions to update Adobe Reader, now it can auto update however I think it’s best to use your environments Endpoint Management platform to control the release of updates).
Change Load trusted root certificates from Adobe to Enable & Install silently (This just takes the responsibility away from user confusion from popups if there is a need to update any certificates).
Place a check in Disable upsell.
Place a check in Disable all Adobe Services. Most Adobe services should be run from the web and users needing to create adobe sign documents wont be using the reader version.
Finally place a check in Disable third party connectors such as Dropbox, Google Drive, etc. This assumes your using Office 365 so want to retain SharePoint and OneDrive but want to block other services.
Step 9
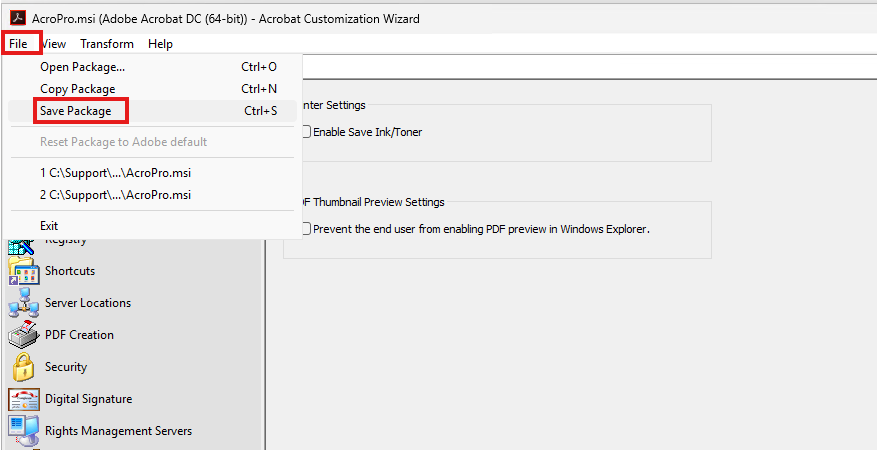
We can now save the package by going to the File menu and selecting Save Package.
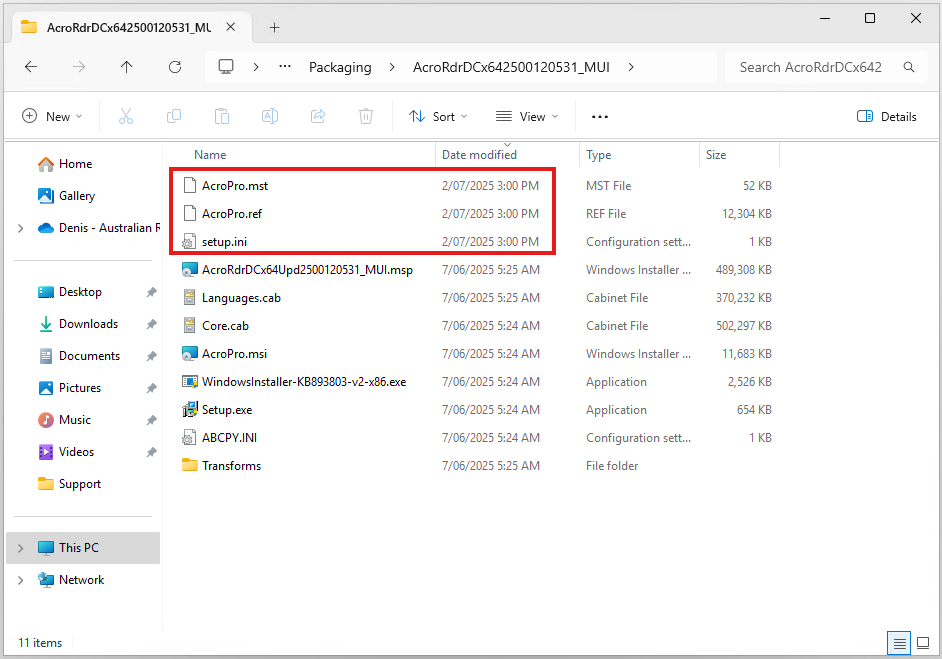
Step 10
Save package won’t bring up a file save dialog box, it will simply create (or update) the AcroPro.mst & AcroPro.ref files and update the setup.ini file in the existing folder.
The .mst file is a MSI Transform file that contains the customisations that are applied as part of the msiexec.exe install string, these overwrite defaults during the install.
The .ref file is used by the Adobe Customisation Wizard if you want to reopen the package and make additional changes.
the setup.ini file is called automatically by setup.exe and contains the install string and other properties to ensure the install is silent and the .mst is called.
The package has now been created and can be copied to a machine and tested by just running setup.exe
Step 11
The package is now ready for testing, so copy the install files to your network software distribution library.
It’s recommended to use the naming convention of [Manufacturer]\[Product]\[Version] to keep things structured and easy to find in the future.